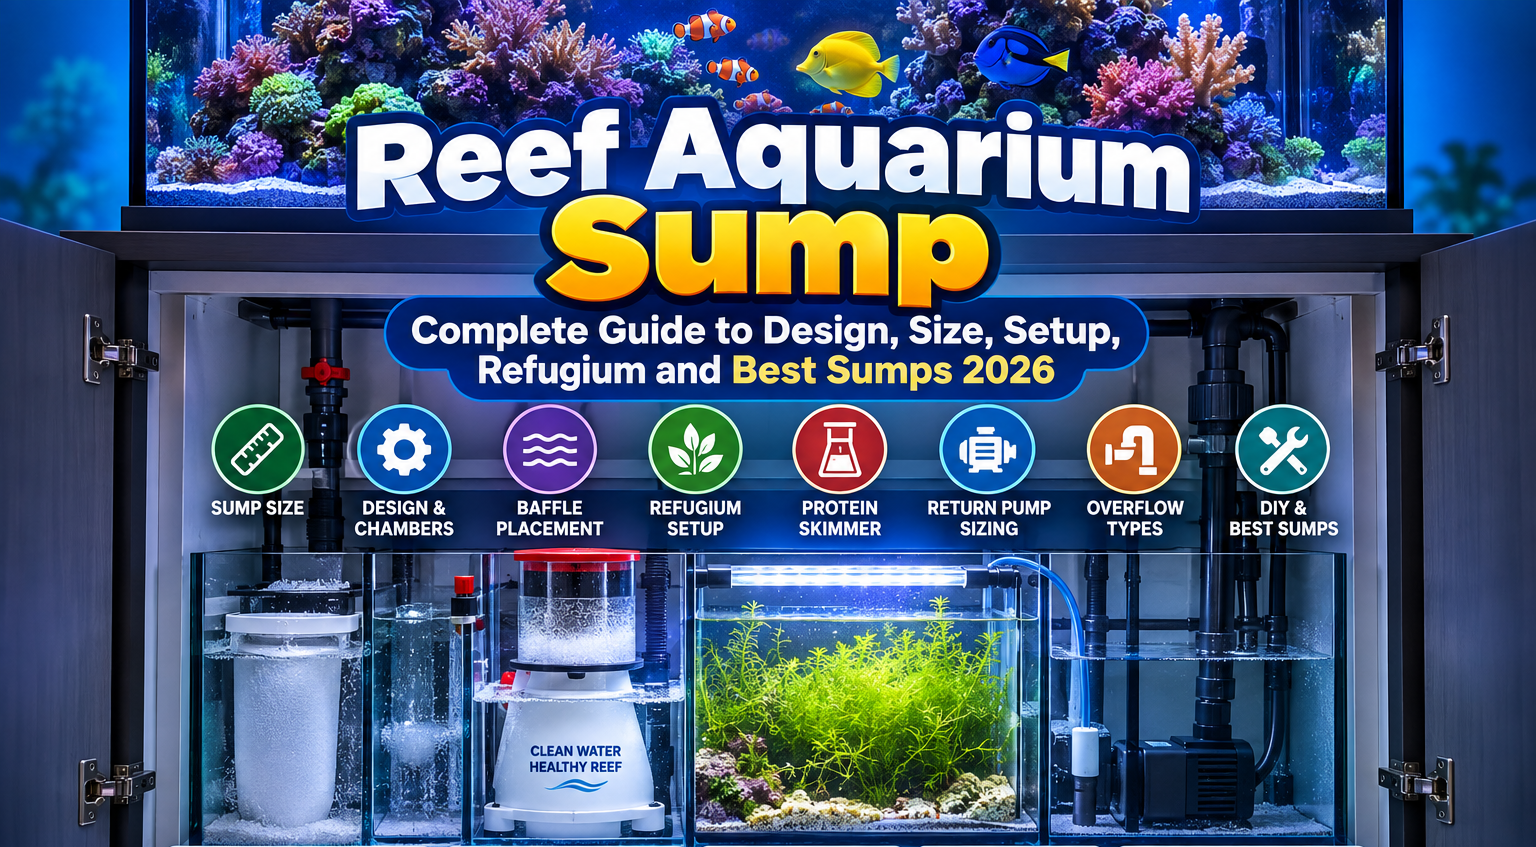
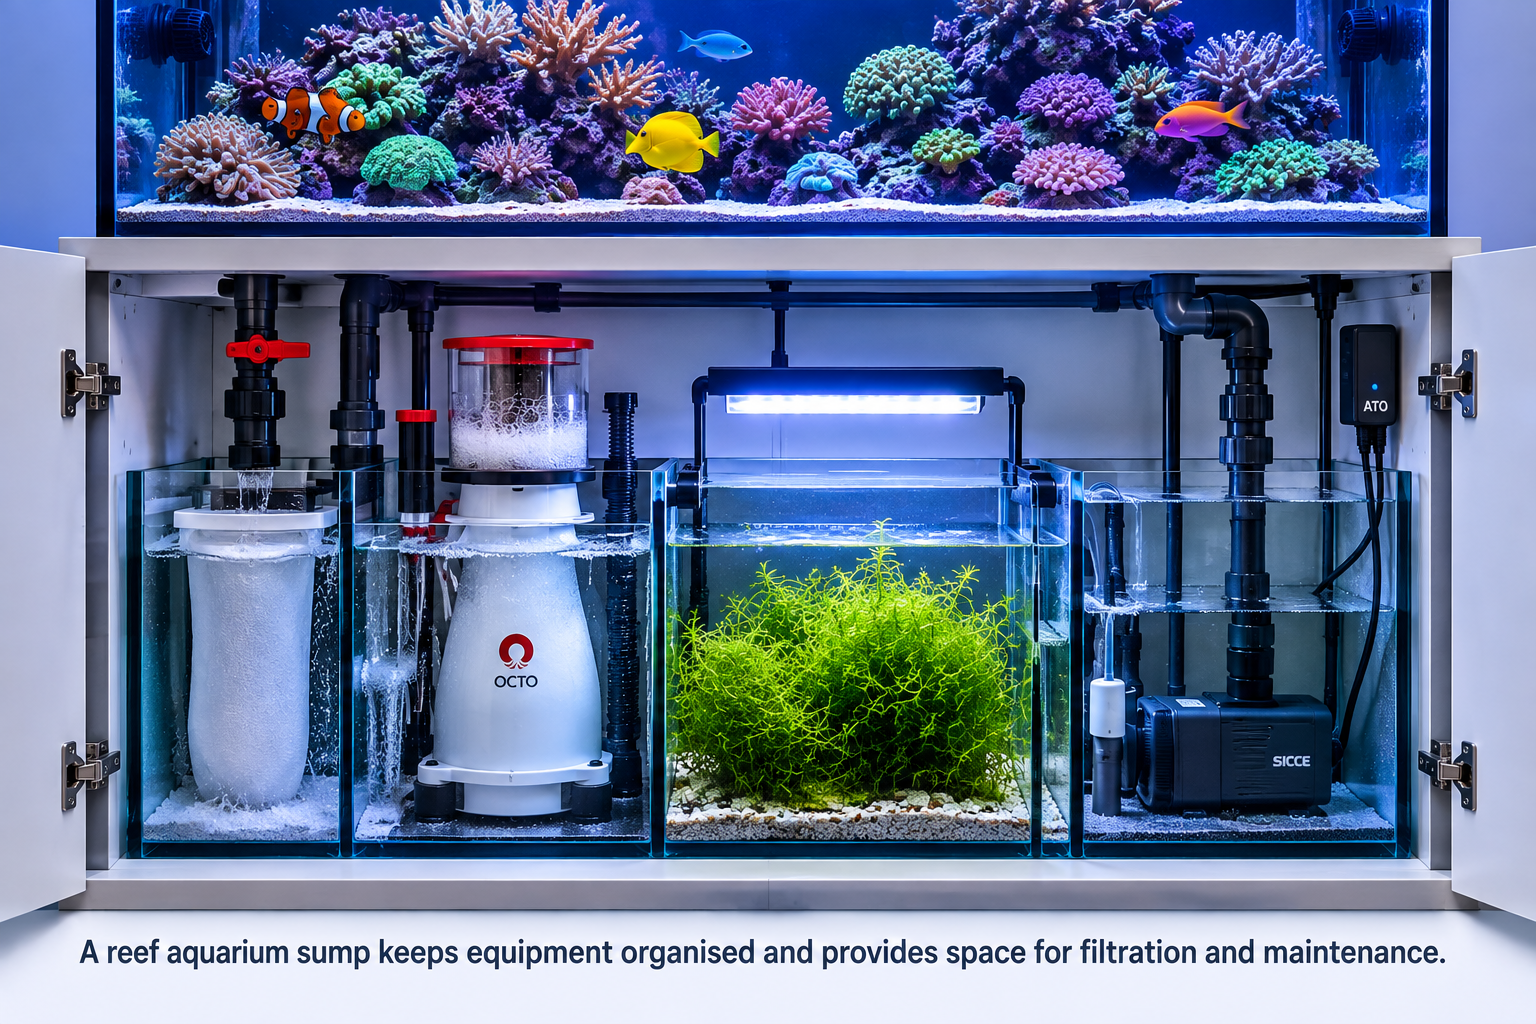
A reef aquarium sump is an auxiliary tank connected to a marine display aquarium. It provides space for filtration equipment, increases the system’s operating water volume and can include a refugium for macroalgae and microfauna. A well-planned sump also helps keep equipment out of the display, making the aquarium easier to view and maintain.
The right sump depends on the display tank, livestock, cabinet dimensions, equipment, plumbing and maintenance routine. This guide covers reef aquarium sump setup, sizing, chamber and baffle design, refugium options, protein skimmer placement, return-pump flow, overflow systems and DIY construction. If you are still planning the display itself, start with our 100-gallon fish tank guide or review the fish tank dimensions guide to understand the space and weight involved.
In This Guide
- What does a sump do in a reef aquarium?
- What size sump do you need?
- How many chambers should a reef sump have?
- Reef sump baffle design and placement
- What is the best sump design?
- Sump vs. refugium
- Do you need a refugium?
- Where should the protein skimmer go?
- Return-pump flow rate and sizing
- Drilled vs. hang-on overflow boxes
- Can you run a reef tank without a sump?
- How to build a DIY reef sump
- Choosing a ready-made reef sump
- Setup and commissioning checklist
- Sump maintenance and troubleshooting
- Frequently asked questions
1. What Does a Sump Do in a Reef Aquarium?
A sump is a separate vessel connected to the display’s circulation system. Water usually drains through an overflow into the sump, passes through filtration or equipment sections, and returns to the display through a return pump. The sump itself is not a filter; its usefulness comes from the equipment and biological processes it can accommodate.
A reef sump commonly supports five functions:
- Equipment housing: Keeps heaters, probes, skimmers and other equipment out of the display.
- Mechanical filtration: Filter socks or fleece rollers capture suspended particles.
- Biological filtration: Suitable surfaces can support microbes involved in processing nitrogenous waste.
- Nutrient management: A dedicated section can house macroalgae or other nutrient-management equipment.
- Water-level management: In many layouts, evaporation is most visible in the return chamber, making top-off easier to monitor.
A sump can also improve access to equipment. That benefit depends on cabinet design: the skimmer cup, pump, filter media and plumbing should be removable without dismantling the entire system. Our marine fish tank stand and size guide can help you plan cabinet space, equipment clearance and the practical dimensions of a marine aquarium installation.
Why Total Water Volume Matters
Water in the display and sump forms one circulating system. More actual water volume can dilute a given addition or waste input, but it does not automatically stabilise every parameter. The result depends on the volume of water actually present, the rate of input, filtration capacity and the behaviour of the parameter being measured.
For example, a nominal 100-gallon display connected to a sump may contain more operating water than the display alone. However, the sump’s advertised capacity is not the same as its operating water volume. Equipment displaces water, the sump is not filled to its rim, and rock and sand also affect the amount of water in the system.
Bagchi et al. (2014) studied ammonia-oxidising microorganisms in aquarium biofilters. Their research supports the importance of established biofiltration, but it does not show that adding sump volume alone guarantees improved water quality. Preena, Rejish Kumar and Singh (2021) review nitrogen processing in recirculating aquaculture systems and explain that microbial activity depends on environmental conditions and the biofilter community.
For practical troubleshooting, use water testing and a clear maintenance routine rather than assuming that a larger sump will solve every problem. Our fish aquarium problems and solutions guide provides broader context for identifying water-quality and equipment issues.
2. What Size Sump Do You Need for a Reef Tank?
The correct reef aquarium sump size depends on more than display-tank gallons. Consider the equipment footprint, cabinet opening, plumbing access, normal operating water level and the water that can drain from the display when the return pump stops.
A percentage of display volume can be used as an initial shopping estimate, but it is not a universal engineering standard. A compact sump with well-planned chambers may suit one system, while another aquarium may need more space for a skimmer, refugium, roller filter or additional equipment.
Measure the Cabinet and Equipment First
Measure the cabinet’s usable internal length, width and height. Then check the external dimensions of the sump and the equipment that must fit inside it. Confirm that the sump can pass through the cabinet doors and that the skimmer cup, pump and filter components can be removed for cleaning.
Nominal tank volume does not tell you whether a sump will physically fit. Use the fish tank dimensions comparison when comparing possible vessels, and consult the 300-gallon aquarium guide if you are planning a larger display and need to consider the overall installation.
Illustrative Sump-Size Planning Table
These are rough ranges to help compare possible footprints, not guaranteed minimums or manufacturer standards. The actual choice must be checked against equipment dimensions, cabinet access and measured drain-down volume.
| Display volume | Example sump range to investigate | What to check |
|---|---|---|
| 30 gallons | 10–20 gallons | Equipment footprint, return chamber and drain-down capacity |
| 55 gallons | 15–30 gallons | Skimmer dimensions, filter access and cabinet opening |
| 75 gallons | 20–40 gallons | Refugium space, operating level and power-off reserve |
| 100 gallons | 25–50 gallons | Equipment layout, plumbing access and freeboard |
| 150 gallons | 40–75 gallons | Skimmer capacity, maintenance access and drain-down volume |
These ranges are not a promise that every aquarium of a given size needs a particular sump. A 75-gallon display does not automatically require a 30-gallon sump, and a 150-gallon reef does not automatically need a 75-gallon sump. Select a sump that accommodates the equipment and provides safe reserve capacity.
Calculate Drain-Down Before Filling the Sump
When the return pump stops, water may drain from the display until the overflow reaches its resting level. Water can also siphon backwards through return plumbing unless the plumbing design prevents it. The sump must have enough unused capacity to contain this water without spilling.
A starting estimate is: drain-down volume = display surface area × expected water-level drop. Keep the units consistent, then convert the result to gallons or litres. Include water that may return from plumbing. This estimate depends on the actual layout and should be confirmed by testing.
Leave freeboard rather than filling the sump close to the rim. Test the system with the return pump off, confirm that the sump contains the drain-down water, restart the pump and check that normal operating levels return. Repeat the test after changing the overflow, return outlet or plumbing.
3. How Many Chambers Should a Reef Sump Have?
There is no required chamber count for every reef aquarium. Two-, three- and four-chamber layouts can all work when water flows predictably, equipment receives the conditions it needs, and the sump has enough capacity for power-off drain-down.
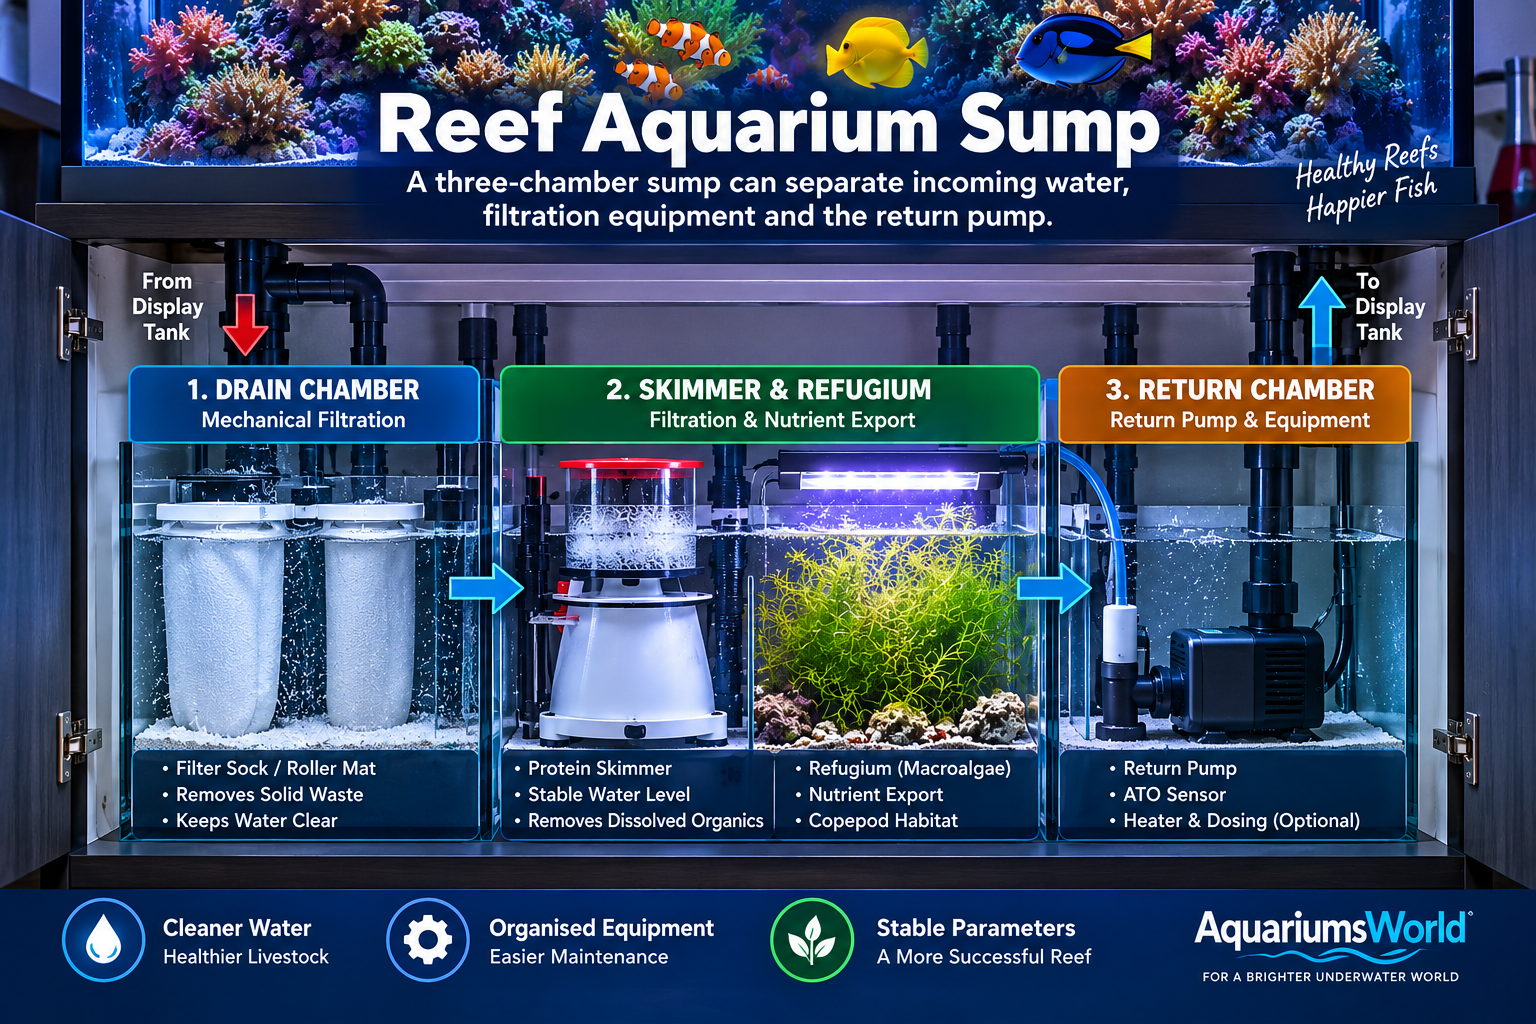
Three-Chamber Sump Design
A three-chamber sump is a common arrangement because it separates incoming water, filtration equipment and the return pump without adding unnecessary complexity.
- Drain and mechanical filtration: Display water enters through the overflow. A filter sock, fleece roller or other mechanical filter can capture particles.
- Skimmer and optional refugium: The skimmer sits in a chamber with a suitable water depth. If space allows, a refugium may occupy part of this area or a separate compartment.
- Return chamber: The return pump sends water back to the display. This chamber often shows the most visible water-level change from evaporation.
A combined skimmer-and-refugium chamber can save space, but the two functions may have different needs. The skimmer must operate at its specified depth, while the refugium needs suitable lighting, flow and access for macroalgae harvesting.
Four-Chamber Sump Design
A four-chamber layout can provide separate sections for the drain, skimmer, refugium and return pump. This gives the aquarist more control over water level and flow in each area. It can be useful when the refugium is a major part of the nutrient-management plan.
More chambers also mean more baffles, more potential restrictions and less uninterrupted space for equipment. Each divider should serve a clear purpose rather than being added simply to increase the chamber count.
Plan the Layout Around the Equipment
Before purchasing or building, draw the equipment to scale. Include the skimmer body and cup, filter sock or roller, heater, probes, return pump, ATO sensor, dosing lines and reactors. Leave enough space to lift equipment out for cleaning.
If you use automated dosing, keep the dosing equipment accessible and follow its manufacturer’s installation instructions. Our aquarium dosing pump setup and calibration guide explains dosing-pump channels and calibration. For a broader look at aquarium automation, consider how the sump layout will accommodate tubing, sensors and maintenance access.
4. Reef Sump Baffle Design and Placement
Baffles are internal dividers that guide water through the sump and establish operating water levels. They can also help reduce the number of air bubbles that reach the return pump. Their effectiveness depends on height, spacing, flow rate and the sump layout.
Over-Under-Over Bubble-Trap Configuration
A common bubble-trap arrangement uses three baffles. Water passes over the first baffle, under the second and over the third. This changing flow path can encourage bubbles to rise or separate before water reaches the return chamber.
This arrangement does not guarantee that all microbubbles will disappear. A skimmer may release fine bubbles, and excessive flow can carry them through the trap. Baffle spacing should allow suitable water movement and follow the design requirements of the sump. There is no universal spacing measurement that suits every aquarium.
Over-Under-Over vs. Under-Over-Under
Both arrangements are used. Choose the configuration based on the desired water path, operating depths and equipment. The position of the first baffle can help establish the water level in an upstream chamber, while other baffles may be arranged to suit the skimmer or refugium.
If bubbles reach the display, inspect the water level, return-pump intake, skimmer output, plumbing connections and flow rate. A bubble trap cannot correct a pump that is drawing air or a skimmer that is releasing excessive bubbles into the return path.
Choose Baffle Height Carefully
Baffle height affects the operating depth of each chamber. Use the skimmer manufacturer’s recommended water depth as a design input. If the skimmer and refugium need different conditions, consider separate sections or a suitable skimmer stand.
The return chamber is usually where evaporation is most apparent. Keep enough usable volume to avoid frequent pump-level changes, while retaining enough empty capacity for drain-down. An automatic top-off system can replace evaporated freshwater, but it must be tested so a sensor or valve failure does not overfill the system.
5. What Is the Best Sump Design for a Reef Tank?
The best reef sump design is the one that fits the aquarium, equipment, maintenance preferences and safety requirements. A simple sump can be effective when it provides suitable filtration and reliable water movement. A more complex design may be useful when a dedicated refugium, roller filter or extra equipment section is needed.
Berlin-Style Sump
A Berlin-style approach is relatively simple and commonly centres on live rock and protein skimming, with other equipment added as needed. Its appeal is straightforward operation and fewer compartments to maintain.
A named design is not a guarantee of adequate filtration. Stocking density, feeding, rock quantity, circulation and nutrient-management goals still matter. Monitor water quality instead of assuming that a particular layout will handle a given bioload.
Refugium Sump
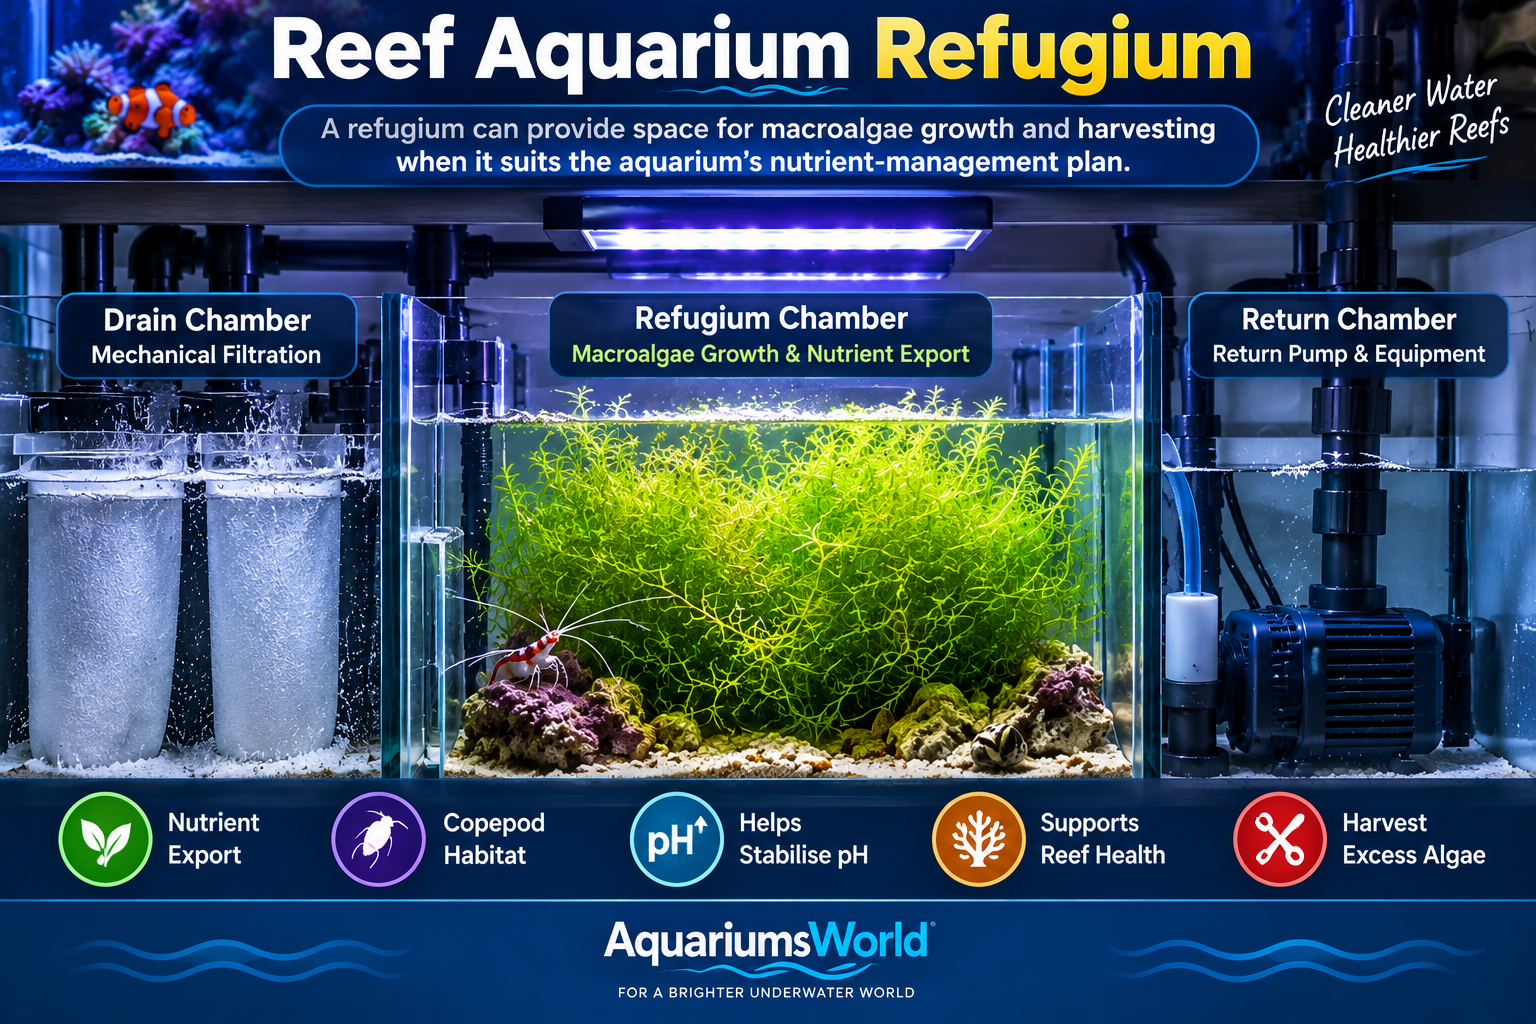
A refugium sump includes a section for macroalgae or other organisms intended to support nutrient management and habitat. It may also provide a place for small crustaceans and other microfauna to reproduce with less disturbance than in the display.
A refugium needs suitable lighting, circulation and maintenance access. Macroalgae must be harvested when growth is sufficient, and the aquarist should monitor nutrients to ensure the system remains appropriate for its livestock.
Refugium-Focused Methods
Some reef methods place substantial emphasis on a large refugium and a defined nutrient management and supplementation protocol. These approaches require careful testing and consistent maintenance. Do not assume that omitting a protein skimmer or adopting a particular method is suitable without understanding the complete system requirements.
Ready-Made Sumps
Commercial sumps may include pre-installed baffles, filter-sock holders, probe holders, refugium sections or adjustable features. These can reduce fabrication work, but the sump still needs to fit the cabinet and intended equipment. Compare internal dimensions, operating depth, access and drain-down capacity rather than choosing by brand name alone.
6. What Is the Difference Between a Sump and a Refugium?
A sump is the auxiliary tank connected to the display aquarium. It can house several kinds of filtration and equipment. A refugium is a dedicated area that provides a comparatively protected environment for macroalgae, microfauna or other organisms.
A refugium may be built into a sump or installed as a separate vessel. A sump does not need to contain a refugium, and a refugium is not necessarily the entire sump. The terms describe different functions: the sump is the broader equipment and water-management vessel, while the refugium is a specific habitat or nutrient-management section.
When planning a reef sump with refugium, decide what the refugium is intended to achieve. Nutrient uptake, microfauna habitat and macroalgae growth require space and maintenance. If those goals are not important to the system, a simpler sump may be easier to operate.
Microfauna are one possible reason to include a refugium. Read our copepods in reef aquariums guide for more information about species, feeding and culture considerations.
7. Do You Need a Refugium in Your Reef Sump?
No. A refugium is optional, not a requirement for every reef aquarium. It can be useful when macroalgae growth and harvesting fit the aquarist’s nutrient-management plan. Other systems may manage nutrients through feeding control, water changes, skimming, mechanical filtration or other methods.
How Macroalgae Can Support Nutrient Export
Growing macroalgae can take up nitrogen and phosphorus compounds from the water. When algae is harvested and removed from the system, some nutrients incorporated into its biomass are exported. The amount removed depends on species, growth conditions, nutrient availability, lighting, water movement and the amount of biomass harvested.
Li et al. (2020) studied Chaetomorpha maxima integrated with a moving-bed bioreactor treating maricultural wastewater. The experimental system reported average total-nitrogen and total-phosphorus removal efficiencies of 42.8% and 83.7%. These results demonstrate nutrient-removal potential in that specific treatment system; they are not a prediction of the percentage a home reef refugium will remove.
Xie et al. (2026) compiled published research on marine macroalgae nutrient removal. This provides broader context for macroalgae nutrient uptake, but a global dataset does not establish a fixed performance rate for a particular aquarium. A home refugium differs from a wastewater bioreactor in scale, water chemistry, species, flow and operating conditions.
Chaetomorpha and Other Macroalgae
Chaetomorpha is commonly used in aquarium refugiums because its filamentous growth can be harvested in portions. Suitability depends on the species available, aquarium conditions and whether the aquarist can maintain it. Other macroalgae, including Gracilaria and Ulva, may be considered where appropriate, but they differ in growth, structure and care requirements.
Avoid treating any macroalga as maintenance-free. Inspect it for trapped detritus, pests and declining growth. Remove excess biomass before it decays, and avoid introducing unidentified algae from unreliable sources.
Refugium Lighting and pH
Some aquarists run refugium lighting while the display lights are off. This is often called a reverse photoperiod. The aim is to have refugium photosynthesis occur during a different part of the day from photosynthesis in the display.
Photosynthesis and respiration affect dissolved carbon dioxide, which is related to pH. A reverse schedule may influence the daily pH pattern, but it does not guarantee a particular pH or eliminate normal variation. Measure pH over time and consider the whole system, including room ventilation, alkalinity, gas exchange and livestock demand.
Refugium lighting is different from lighting a planted freshwater aquarium. For a separate discussion of plant-focused lighting, see our aquarium LED lighting for plants guide and full-spectrum aquarium light and PAR guide.
8. Where Should You Put the Protein Skimmer in a Sump?
Place the protein skimmer in a chamber that maintains the water depth specified by its manufacturer. A consistent water depth helps the skimmer operate predictably. If the water level changes significantly, the skimmer may need repeated adjustment and can produce inconsistent foam.
Many layouts position the skimmer after the drain and mechanical-filtration section. This can separate it from some turbulence and debris entering from the display. The exact location depends on the sump design and skimmer instructions.
Avoid placing the skimmer where it cannot be removed for cleaning or where its output sends a large volume of bubbles directly into the return pump. A dedicated chamber is not essential for every model; use equipment specifications and actual operating behaviour to guide placement.
If the skimmer produces excessive bubbles, check the break-in period, water depth, air intake, output setting and whether additives are affecting foam formation. A stable chamber helps, but it cannot correct every skimmer issue.
9. What Return-Pump Flow Rate Do You Need for a Reef Sump?
Select a return pump based on the flow required by the system’s circulation and filtration arrangement, together with the overflow’s capacity. The pump must deliver the intended flow after accounting for vertical lift, pipe diameter, elbows, valves and other restrictions. The advertised maximum flow is not necessarily the flow it will deliver in your installation.
Hobby guides sometimes use display-volume multipliers as a starting point. These can help with an initial comparison, but they are not universal rules for reef circulation. Display flow for corals is often supplied by separate circulation pumps, while the return pump moves water between the display and sump at a rate the overflow and filtration can handle.
Illustrative Return-Flow Calculation
The figures below show the arithmetic for a five-times-per-hour calculation. They are not a recommendation for every aquarium and do not account for head pressure, overflow limits or equipment specifications.
| Display volume | 5× calculation | What to verify |
|---|---|---|
| 30 gallons | 150 GPH | Pump curve, plumbing lift and overflow capacity |
| 55 gallons | 275 GPH | Required filtration flow and drain limits |
| 75 gallons | 375 GPH | Flow requirement, noise and bubble behaviour |
| 100 gallons | 500 GPH | Head pressure, return plumbing and overflow design |
| 150 gallons | 750 GPH | System design and manufacturer specifications |
Use the manufacturer’s pump curve to estimate flow at the system’s total head. If the pump has adjustable output, begin conservatively and increase it while observing the overflow, sump levels, noise and bubbles. Confirm that the overflow can safely handle the maximum possible return flow.
A valve can regulate flow where appropriate, but do not restrict a pump in a way that conflicts with its instructions. An adjustable DC pump may offer convenient control, yet suitability still depends on reliability, serviceability and plumbing.
10. Reef Aquarium Sump Overflow Box: Drilled vs. Hang-On
An overflow transfers water from the display to the sump while helping maintain the display’s operating water level. Two broad approaches are a drilled tank with an internal overflow and a hang-on overflow used on a tank that has not been drilled.
| Consideration | Drilled tank with internal overflow | Hang-on overflow |
|---|---|---|
| Installation | Requires a compatible drilled or reef-ready aquarium | Can be retrofitted to some non-drilled tanks |
| Failure planning | Needs protection against blocked drains and adequate emergency capacity | Must account for siphon loss and air accumulation where applicable |
| Noise | Depends on drain design, adjustment and flow | Depends on design, setup and maintenance |
| Planning priority | Confirm drilling, drain layout and emergency provision | Confirm reliable siphon operation and a safe failure plan |
A drilled tank is not automatically flood-proof, and a hang-on overflow is not automatically unsafe. The critical question is what happens if a drain becomes restricted, a siphon is interrupted or the return pump stops. Design for foreseeable failures and test the system before leaving it unattended.
Bean Animal vs. Herbie Overflow
A Herbie-style drain commonly uses a full-siphon line and a separate emergency drain. A Bean Animal-style arrangement uses three drain lines, typically a full siphon, an open channel and an emergency line. Both designs depend on correct installation, adjustment and adequate emergency capacity.
Do not choose a drain solely because it is described as quiet or popular. Confirm that the aquarium can accommodate the required holes and plumbing, that the emergency route can handle the flow, and that the design can be inspected and maintained. Follow a reliable plan for the exact overflow system rather than mixing components without understanding how they operate.
11. Can You Run a Reef Tank Without a Sump?
Yes. A reef aquarium can operate without a sump if its filtration, circulation, heating, gas exchange and maintenance needs are met through other equipment. Depending on the aquarium, alternatives may include a hang-on-back skimmer, hang-on filter, external filter or separate refugium.
A sump becomes more attractive when the display is large, equipment is difficult to hide, or the aquarist wants dedicated space for a skimmer, mechanical filtration and refugium. It can make equipment access easier, but it also introduces plumbing, cabinet-space and flood-prevention considerations.
A canister filter is not the same as a sump. It is a closed filtration device that can provide mechanical and biological filtration, depending on its media and maintenance. A sump is an auxiliary vessel that can accommodate several types of equipment. Neither option removes the need to monitor water quality and clean filtration components.
For a small reef or fish-only-with-live-rock system, a no-sump arrangement may be practical if the equipment is appropriately sized and maintained. For any system, make the decision based on livestock needs, space, budget, reliability and maintenance requirements.
12. DIY Reef Sump: How to Build One
A DIY reef sump can be made by adapting a suitable aquarium with internal dividers. This approach offers flexibility, but it requires careful measurement, compatible materials and a safe plan for water movement. If you are not confident working with glass, sealant or aquarium plumbing, consider a professionally built sump or ask an experienced aquarium fabricator to review the design.
Plan Before Buying Materials
- Measure the cabinet opening and available footprint.
- Confirm that the sump can be inserted, removed and serviced.
- Measure the skimmer, pump, filter equipment and planned refugium.
- Draw the water path and mark operating water levels.
- Estimate drain-down volume and reserve enough freeboard.
- Choose materials suitable for continuous aquarium use and compatible with the vessel.
Materials and Tools
A typical build may require an appropriate aquarium, baffle material, aquarium-safe sealant compatible with the materials, measuring tools, a level, temporary supports and tools suitable for cutting and finishing the baffles. Verify that all materials are suitable for aquarium use and follow the sealant manufacturer’s curing instructions.
Acrylic and glass do not bond to one another in the same way that glass bonds to glass. Do not assume ordinary silicone will create a reliable structural joint between acrylic baffles and a glass tank. Select a design and materials with suitable mechanical support and seek expert advice if necessary.
Lay Out the Chambers
A three-section DIY sump might allocate space to mechanical filtration, skimming and optional refugium functions, then the return pump. The proportions should be based on equipment dimensions rather than a fixed percentage of sump length. A large skimmer may need more room than a compact filter holder, while a refugium may need enough area for macroalgae growth and harvesting access.
Place equipment templates inside the sump before fixing the baffles. Check that the skimmer cup can be removed, the pump can be lifted out, and hands can reach valves and fittings. Ensure that baffles do not block access to plumbing unions or create inaccessible areas where detritus can accumulate.
Build, Cure and Test
Assemble the sump on a stable, level surface and follow the selected material and sealant instructions. Allow the full specified curing time before introducing aquarium water. Inspect the joints and baffles, then perform a freshwater leak test in a location where a leak will not damage floors or electrical equipment.
After installation, test the complete system with the return pump running and stopped. Confirm normal operating levels, emergency drain behaviour and safe drain-down capacity. Check for leaks, vibration, unstable water levels and bubbles before adding livestock.
A pre-cut baffle kit may simplify measuring and fabrication, but it does not remove the need to verify dimensions, material compatibility, curing, water levels and flood safety.
13. Choosing a Ready-Made Reef Aquarium Sump
A ready-made sump can save fabrication time and may include useful features such as filter-sock holders, adjustable baffles, probe holders or dedicated equipment sections. The right choice depends on the actual product dimensions and your intended setup.
Before purchasing, compare:
- External dimensions and whether the sump fits through the cabinet opening
- Internal chamber dimensions and skimmer operating depth
- Normal operating water volume and available drain-down capacity
- Compatibility with filter socks, fleece rollers and other mechanical filters
- Space for the return pump, ATO sensor, heaters and probes
- Access for cleaning, removing equipment and servicing plumbing
- Material, construction quality, warranty and replacement-part availability
Brands such as Trigger Systems, Reef Octopus, Eshopps, Bashsea, IceCap and Fiji Cube may appear in reef-sump shopping searches. Product ranges, dimensions, features and availability change, so compare current manufacturer specifications and retailer listings rather than relying on an old model name or price.
Avoid labelling a particular model “best overall” without a defined use case and current evidence. A sump that suits one aquarium may not suit a larger system or a cabinet with a narrow opening. For commercial content, provide verified dimensions, compatible equipment, current pricing and a clear explanation of the intended use.
14. Reef Aquarium Sump Setup Checklist
Use this checklist before adding livestock or leaving a newly installed system running unattended.
- Confirm that the sump fits the cabinet and can be accessed for maintenance.
- Check that equipment fits and can be removed without dismantling the system.
- Set the skimmer chamber to the manufacturer’s required water depth.
- Confirm that the return pump is compatible with the plumbing and overflow.
- Check that drain plumbing is secure and has an appropriate emergency plan.
- Run the system and inspect all connections for leaks.
- Stop the return pump and verify that the sump safely contains drain-down water.
- Restart the pump and confirm that water levels return to normal.
- Check for excessive noise, vibration, air leaks and microbubbles.
- Test any automatic top-off equipment and ensure it cannot overfill the system.
- Label valves and electrical connections where helpful.
- Record baseline water parameters and establish a maintenance schedule.
15. Sump Maintenance and Troubleshooting
Microbubbles in the Display
Microbubbles may come from the protein skimmer, a leaking pump intake, a low return-chamber water level or excessive turbulence. Inspect the skimmer output and plumbing, check that the pump is not drawing air, and confirm that the return chamber maintains a suitable operating level. Adjust flow only within the safe limits of the overflow and equipment.
Water-Level Changes
Evaporation commonly appears as a falling water level in the return chamber. Check whether the automatic top-off system is operating correctly and whether the sensor is clean and positioned properly. Do not compensate for evaporation by adding saltwater: evaporation removes water but leaves most dissolved salts behind. Use suitable freshwater for top-off while monitoring salinity.
Excessive Noise
Noise may result from drain adjustment, air entering plumbing, vibration, pump operation or water falling too far between chambers. Check the overflow instructions, secure loose pipes and use suitable supports. Do not silence a drain by restricting it in a way that removes emergency capacity.
Detritus Accumulation
Debris can collect in low-flow areas, under equipment or in refugium sections. Inspect the sump during routine maintenance and remove accumulated waste as appropriate. Clean mechanical filters according to their type and the system’s needs. Avoid cleaning every biological surface at once in a way that disrupts established biofiltration.
Skimmer Performance Changes
A skimmer’s foam production can change with water depth, maintenance, additives and the condition of the air intake. Confirm the operating depth and clean the equipment according to its instructions. If the skimmer overflows, identify the cause before returning it to normal operation.
If you are troubleshooting several aquarium problems at once, use the aquarium problems and solutions guide as a companion resource.
16. Frequently Asked Questions
What does a sump do in a reef aquarium?
A sump is an auxiliary tank that houses filtration equipment and supports water circulation. It can provide space for mechanical filtration, biological media, a protein skimmer and an optional refugium, while keeping much of the equipment out of the display.
What size sump do I need for my reef tank?
Choose a sump that fits the cabinet, accommodates the equipment and safely holds water draining from the display when the return pump stops. Display volume can help narrow options, but it does not determine the correct sump size by itself.
How do I set up a reef aquarium sump?
Plan the chamber layout, install compatible equipment, connect the drain and return plumbing, and set the operating water levels. Test for leaks and perform a power-off drain-down test before relying on the system.
What is the best sump design for a reef tank?
The best design is the one that meets the aquarium’s filtration, equipment, access and safety needs. Three- and four-chamber layouts are common options, but a simpler design may work well when it provides the required functions.
Do I need a refugium in my reef sump?
No. A refugium is optional. It may support macroalgae growth, nutrient uptake and microfauna habitat, but it requires suitable lighting, circulation and regular maintenance.
Where should I put the protein skimmer in my sump?
Put it in a chamber that maintains the water depth specified by the skimmer manufacturer. Position it so it is accessible for cleaning and its output does not create avoidable bubble problems at the return pump.
What return-pump flow rate do I need?
Select a pump based on the required system flow, overflow capacity and the pump’s output at the installed head height. A simple display-volume multiplier is only a starting calculation, not a universal rule.
What is the difference between a sump and a refugium?
A sump is the auxiliary vessel connected to the display. A refugium is a dedicated section or separate vessel used to provide habitat or grow organisms such as macroalgae. A sump may include a refugium, but it does not have to.
How many chambers should a reef sump have?
There is no required number. A three-chamber sump can separate incoming water, filtration equipment and the return pump. A four-chamber design may provide separate skimmer and refugium sections when the system benefits from them.
Can I run a reef tank without a sump?
Yes. A reef tank can use suitable hang-on or external equipment instead. A sump can make equipment housing and maintenance easier, but it is not the only way to provide filtration.
Conclusion: Plan the Sump Around Your Reef System
A reef aquarium sump can make filtration equipment easier to organise and provide room for mechanical filtration, a protein skimmer, biological media and an optional refugium. Its success depends on practical design: adequate equipment space, suitable operating water levels, reliable plumbing, accessible maintenance and enough free capacity for power-off drain-down.
Start with cabinet dimensions and an equipment list, then plan the chamber order and water path. Choose the return pump using its actual flow at the installed head, and confirm that the overflow can safely handle that flow. If you include a refugium, treat macroalgae as a managed part of the system rather than a guaranteed nutrient solution.
Whether you select a ready-made sump or build one, test the complete setup before adding livestock. A well-planned sump is not defined by its brand, chamber count or advertised gallon capacity. It is defined by how safely and reliably it supports the needs of the aquarium.
For more aquarium planning resources, visit the AquariumsWorld blog.
References
- Bagchi, S., Vlaeminck, S.E., Sauder, L.A., Mosquera, M., Neufeld, J.D. and Boon, N. (2014) ‘Temporal and spatial stability of ammonia-oxidizing archaea and bacteria in aquarium biofilters’, PLoS ONE, 9(12), e113515. https://doi.org/10.1371/journal.pone.0113515
- Li, X. et al. (2020) ‘Integration of marine macroalgae (Chaetomorpha maxima) with a moving bed bioreactor for nutrient removal from maricultural wastewater’, Archaea, 2020, 8848120. https://doi.org/10.1155/2020/8848120
- Preena, P.G., Rejish Kumar, V.J. and Singh, I.S.B. (2021) ‘Nitrification and denitrification in recirculating aquaculture systems: the processes and players’, Reviews in Aquaculture, 13(4), pp. 2053–2075. https://doi.org/10.1111/raq.12558
- Xie, P. et al. (2026) ‘A global dataset on nutrient removal capacity by marine macroalgae’, Scientific Data. https://doi.org/10.1038/s41597-026-06874-4
- Lossing, H.E. (1991) Aquarium filtration system with liquid distributor and protein skimmer. United States Patent 4,988,436. Patent full text