AquariumsWorld • Aquarium Equipment Guide
Aquarium Dosing Pump
An aquarium dosing pump automates the delivery of measured amounts of liquid into an aquarium. It can help reef keepers replenish supplements and freshwater aquascapers deliver plant nutrients on a repeatable schedule. The important word is measured: a pump can repeat a programmed dose, but it cannot decide whether that dose is appropriate for your aquarium.
This guide explains how peristaltic dosing pumps work, when one may be useful, how to choose channels, and how to install, calibrate and maintain the equipment. It also covers calcium, alkalinity and magnesium dosing, freshwater fertiliser, dosing pumps versus calcium reactors, and the limits of using a dosing pump for automatic top-off.
1. What Does an Aquarium Dosing Pump Do?
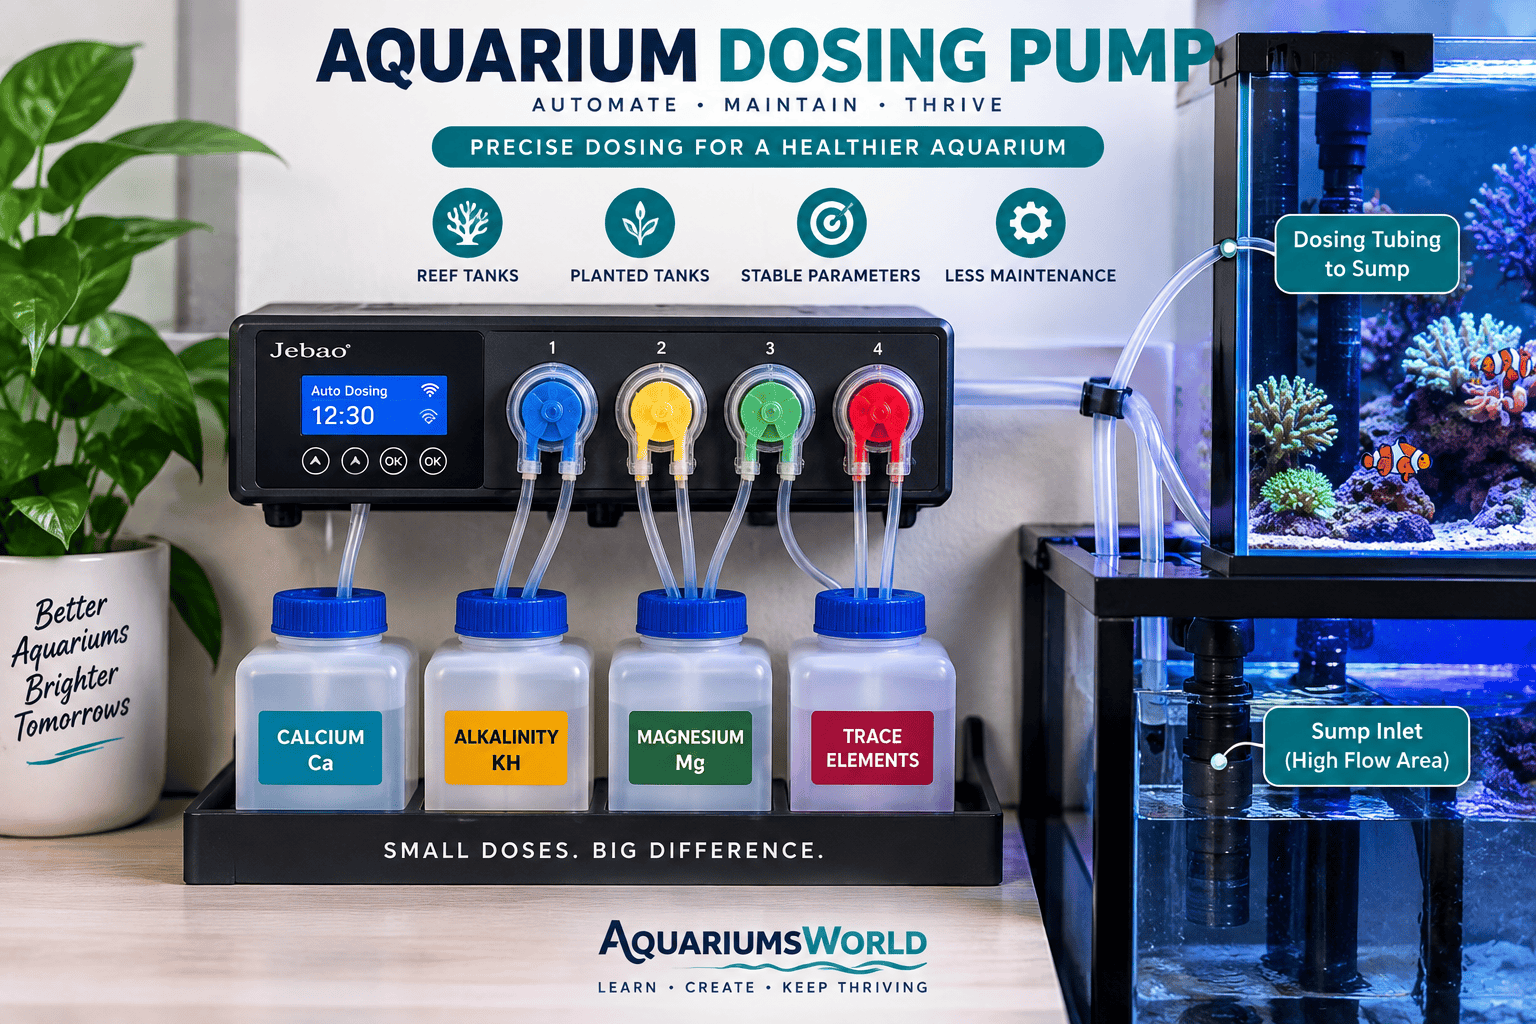
An aquarium dosing pump moves a planned quantity of liquid from a storage container into aquarium water. In reef systems, that liquid may be a calcium supplement, an alkalinity supplement, magnesium solution or another product intended for the aquarium. In freshwater planted systems, it may be a liquid fertiliser containing macronutrients or trace elements.
The main advantage is repeatability. Instead of remembering to add a supplement manually, the aquarist programs a pump to deliver a set volume at chosen times. This can make a maintenance routine easier to follow and can distribute a confirmed daily amount across multiple additions. It does not remove the need for water testing, observation or adjustment.
Why consistency matters
Reef organisms build calcium-carbonate skeletons, and the chemistry involved includes calcium availability, carbonate chemistry and biological regulation. Research into coral calcification examines these mechanisms, including the role of calcium-ion homeostasis. That research provides biological context for monitoring reef-water chemistry, but it does not prescribe an aquarium pump schedule or prove that every reef requires automated dosing (Armstrong and Bahr, 2025).
A pump’s contribution is operational: it can make a chosen addition more repeatable. Whether the chosen dose is correct must be determined separately. Large or poorly matched additions can still create undesirable changes, and automation can repeat a mistake just as reliably as it repeats a correct setting.
2. How Does an Aquarium Dosing Pump Work?
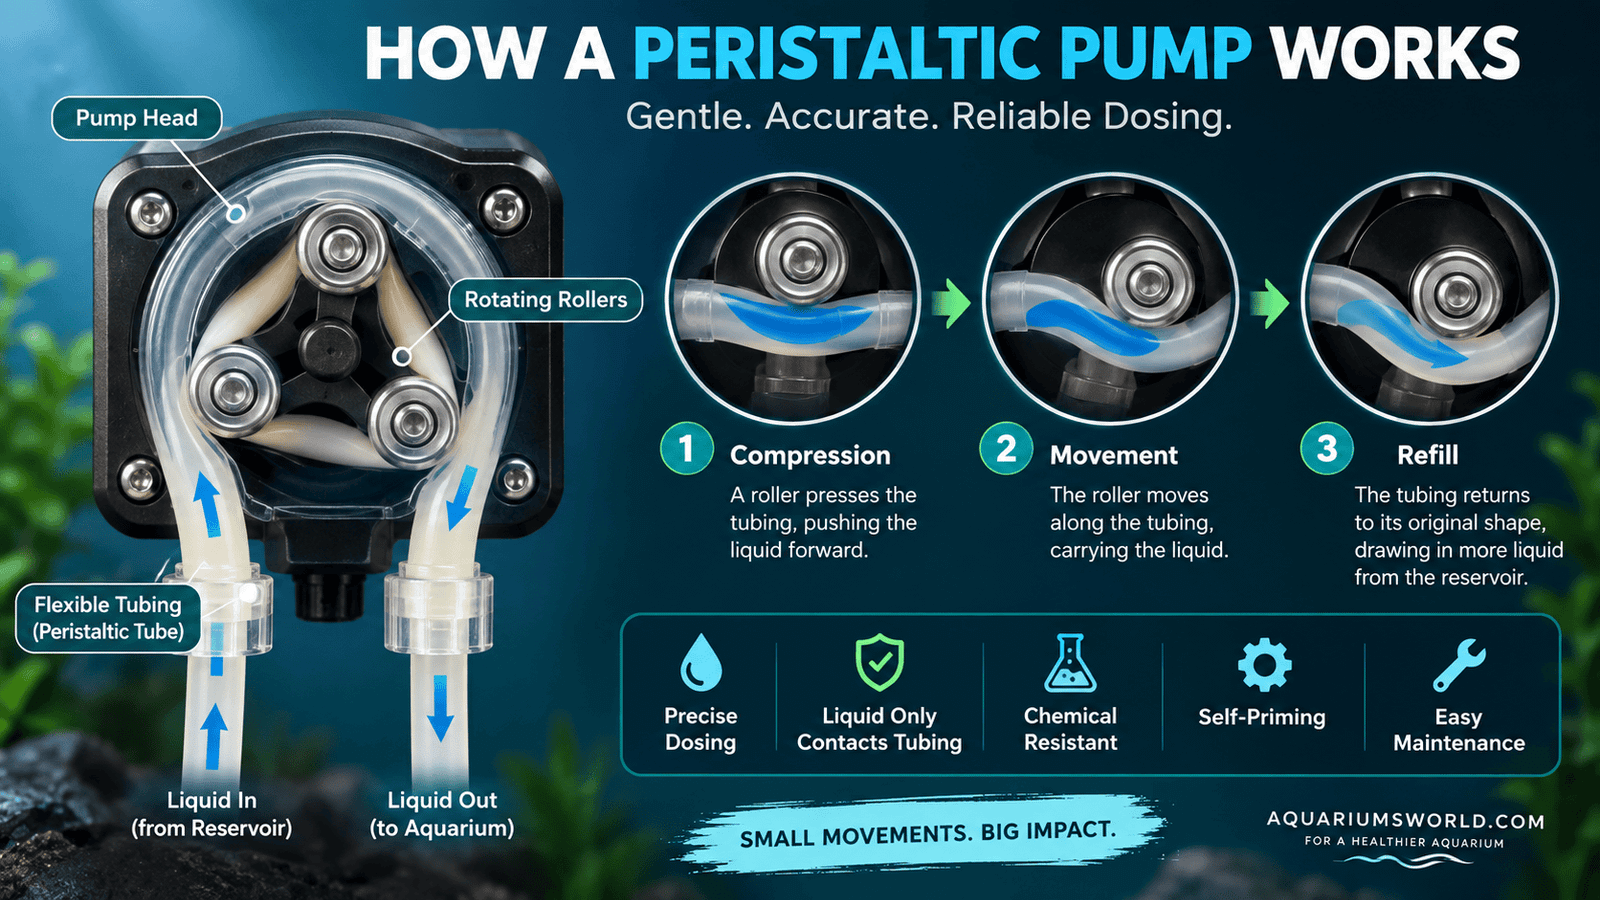
Many aquarium dosing pumps use a peristaltic mechanism. A motor turns a rotor with rollers or shoes that press against flexible tubing. As the compression point moves along the tube, it pushes a small amount of liquid forward. The pump’s programmed operating time or rotation count determines the intended delivery amount.
How a peristaltic pump works
The liquid travels inside the flexible tube rather than through the motor assembly. This arrangement is useful for metering many aquarium liquids, but the tubing is a working component: its material, dimensions, condition and installation can affect output. A pump’s advertised precision should therefore be understood in the context of its specified tubing and operating conditions.
Engineering research has examined how peristaltic pump speed relates to flow and how control methods affect delivery. For example, Sánchez-Saquín and colleagues studied peristaltic pumps in hemodialysis equipment. That is relevant to understanding pump characterisation, but the results should not be treated as an aquarium-specific accuracy guarantee (Sánchez-Saquín et al., 2025).
Peristaltic pump vs standard dosing pump
The terms describe different things. Peristaltic identifies a pumping mechanism; dosing pump describes the intended metering application. Many aquarium dosing units are peristaltic, although the terms are not exact synonyms in every industry or product category. Check the product’s technical specifications rather than assuming that every device labelled “dosing pump” has the same mechanism.
3. Do You Need a Dosing Pump for a Reef Tank?
Not every reef aquarium needs an automatic dosing pump. The decision depends on what is kept in the tank, how quickly the system consumes a supplement, how often testing is performed, and whether the aquarist can maintain suitable conditions through another routine. A fish-only system and a reef with growing stony corals can have very different supplementation needs.
When it may be useful
A dosing pump may be useful when repeated testing shows that a reef consumes a supplement regularly and manual additions are inconvenient or difficult to divide consistently. It can also help an aquarist maintain a repeatable routine while travelling, provided the system has been tested, the reservoirs are adequately sized, and failures can be detected.
When manual dosing may be sufficient
A low-demand aquarium may need little or no routine supplementation. If testing shows that a parameter remains within the aquarist’s chosen target range with regular water changes and ordinary husbandry, a dosing pump may add complexity without solving a real problem. Avoid adding supplements simply because a controller or pump has an unused channel.
4. Can You Use a Dosing Pump for a Freshwater Planted Tank?
Yes. A dosing pump can deliver liquid fertiliser to a freshwater planted aquarium. This may be helpful when a fertilisation routine calls for measured additions on several days of the week, or when the aquarist wants to separate products that should not be stored together.
Plant nutrient requirements vary with plant mass, growth rate, lighting, carbon availability, water changes and the composition of the source water. A pump cannot determine those requirements by itself. Follow the fertiliser manufacturer’s directions, observe plant growth, and adjust only after considering the wider aquarium conditions.
Separating fertiliser products
Some aquarists use separate reservoirs for products such as macronutrient and trace-element solutions. Whether separate channels are needed depends on the product formulations and their compatibility. Do not assume that all fertilisers can be mixed in one container, and do not combine products unless their labels or manufacturer explicitly permit it.
If you use aquarium soil, strong lighting or injected carbon dioxide, treat fertiliser dosing as one part of the overall system rather than an isolated solution. Nutrient additions should be considered alongside plant response, algae growth, maintenance and water testing.
5. How Many Channels Do You Need on a Dosing Pump?
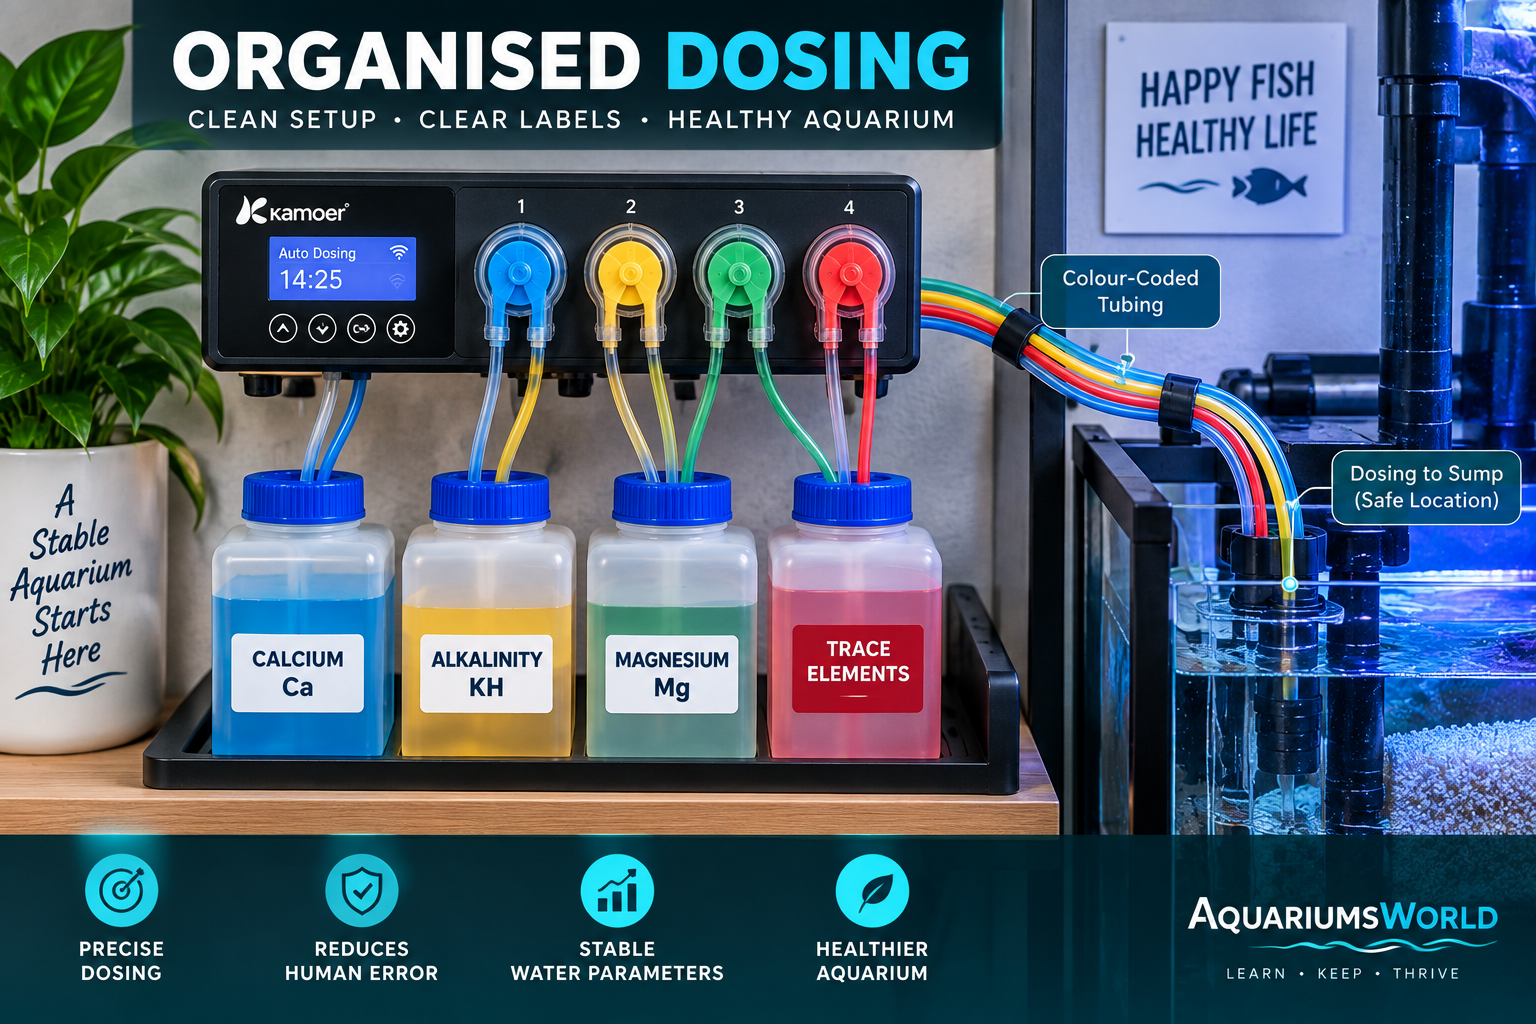
A channel is an independently controlled dosing line. The number you need is determined by how many liquids you intend to dose separately and whether their products can safely share a reservoir or line. More channels provide flexibility, but they also add equipment, tubing, calibration and maintenance.
| Tank setup | Possible channel approach | What to consider |
|---|---|---|
| Fish-only marine aquarium | None, or one if testing identifies a need | Do not supplement automatically without a measured reason. |
| Mixed reef | Separate channels for supplements that require separate delivery | Check product instructions, compatibility and measured consumption. |
| Stony-coral reef | Often more than one independently controlled line | Calcium and alkalinity products may require separate dosing and timing. |
| Freshwater planted tank | One or more, depending on fertiliser products | Use separate lines when formulations should not be mixed. |
A channel count is not a dosing prescription. For example, a three-channel pump does not mean that every reef must dose calcium, alkalinity and magnesium every day. Test results and product instructions determine whether a supplement is needed and how it should be delivered.
Keep calcium and alkalinity concentrates separate unless the product is specifically formulated for combined storage. Concentrated solutions can react or precipitate when mixed. Follow the manufacturer’s directions for reservoir separation, dosing location and spacing between additions.
6. How to Set Up an Aquarium Dosing Pump
Read the pump manual and the supplement label before installation. The steps below are a general checklist; tubing routes, mounting requirements, priming controls and programming screens differ between models.
Step 1: Choose a secure location
Place the unit on a stable surface in a dry, accessible area. Keep electrical connections away from splashes and possible leaks. Follow the manufacturer’s guidance about pump height and reservoir position, because incorrect placement can contribute to siphoning or unwanted flow in some setups.
Step 2: Install the specified tubing
Use the tubing type and size specified for the pump head. Do not substitute tubing based only on appearance: dimensions and material can affect fit, chemical compatibility and delivery. Route lines so they are not kinked, crushed or pulled loose when maintenance is performed.
Step 3: Label the containers and lines
Clearly label each reservoir with the supplement name and concentration. Match the label to the pump channel and outlet line. This simple practice reduces the chance of connecting a line to the wrong container during refilling or maintenance.
Step 4: Prime and inspect each line
Follow the manufacturer’s priming procedure until the line is filled and delivery is steady. Inspect for leaks, trapped air, loose connections and unintended siphoning. Do not allow a concentrated supplement to drip onto electrical equipment or aquarium surfaces that are not intended for it.
Step 5: Calibrate before connecting to the aquarium
Measure actual output using a suitable graduated vessel and the procedure specified by the manufacturer. Confirm that the delivered amount is close to the programmed amount before allowing the line to dose the aquarium. Repeat for every channel because output can differ between pump heads.
Step 6: Program a conservative schedule
Enter the confirmed daily amount and divide it only as appropriate for the product and aquarium. Do not assume that 24 additions per day are always necessary or safe. Check whether the supplement has a recommended maximum rate, minimum interval or preferred dosing time.
Step 7: Verify the first doses
Observe the first scheduled additions and recheck water parameters according to your testing plan. Confirm that the pump stops as expected and that the tubing outlet remains in the intended position. Keep a record of the dose, test result and any adjustment.
7. How to Calibrate an Aquarium Dosing Pump
Calibration checks how much liquid a channel actually delivers compared with the amount the controller believes it delivers. The exact procedure varies by model, so use the manufacturer’s calibration mode when available.
- Prepare a clean graduated cylinder or other suitable measuring vessel.
- Place the dosing outlet securely inside the vessel.
- Run the channel for the calibration period specified in the manual.
- Measure the collected liquid at eye level and record the result.
- Enter the measured value in the pump’s calibration settings, if supported.
- Repeat the test to check that the result is reasonably repeatable.
- Perform the same check for each channel and after relevant maintenance.
A timed flow-rate test can be used for a pump that does not provide an automated calibration function, but the test duration and calculation must match the manufacturer’s instructions. Do not assume that a one-minute test is suitable for every pump or that a result from one channel applies to another.
Recalibrate after replacing tubing or pump-head components, after moving the unit if that affects its installation, or when measured output no longer agrees with the programmed amount. A fixed calendar interval may be useful as a reminder, but the appropriate interval depends on the equipment and use.